How to Use Smart Board: Complete Beginner's Guide for Teachers, Schools & Offices (2026)
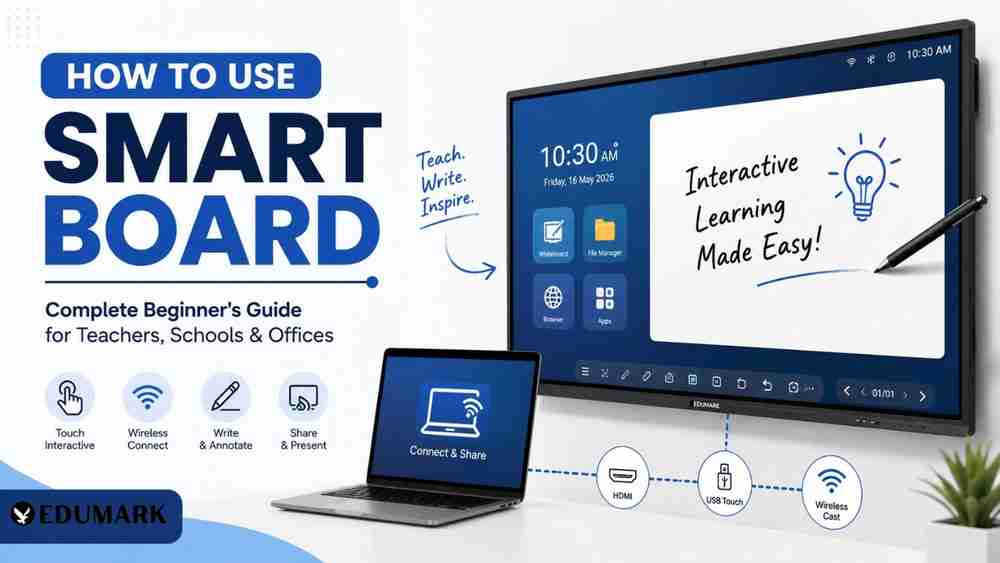
Wondering how to use a smart board? To use a smart board, start by powering on the interactive flat panel and connecting it to Wi-Fi. Open the built-in digital whiteboard app to write, draw, and import files. You can also connect your laptop via HDMI and a USB touch cable, or cast your screen wirelessly to share presentations, videos, and interactive lessons with your classroom.
The traditional chalk-and-duster classroom is rapidly becoming a thing of the past. Today, every forward-thinking school, coaching institute, and corporate office is shifting toward Interactive Flat Panels (IFPs) to create engaging, digital learning environments. But investing in digital infrastructure is only half the battle; knowing exactly how to use a smart board is what truly transforms the teaching and learning experience.
If you have recently upgraded your classroom or are planning to do so, this comprehensive smart board tutorial is for you. In this guide, we will walk you through the complete beginner-to-advanced workflow. You will learn everything from basic setup and connecting your laptop to using advanced whiteboard writing tools, running interactive apps, and troubleshooting common issues.
By the end of this guide, you will be equipped to teach like a pro on any interactive flat panel. Let’s dive in!
What is a Smart Board?
When we talk about modern smart boards, we are primarily referring to Interactive Flat Panels (IFPs). Unlike the older generations of smart boards that required a separate projector, a computer, and constant calibration, today’s smart classroom board is a standalone, all-in-one digital marvel.
Here is what makes up a modern smart board:
- Interactive Flat Panel: A high-definition, backlit LED/LCD screen (usually 4K) that requires no projector.
- Touch Display: Equipped with multi-touch technology (often up to 40 touch points), allowing multiple users to write simultaneously.
- Android System: Built-in Android OS enables it to function like a massive tablet. You can browse the web, download apps, and use the whiteboard without connecting a PC.
- Windows OPS (Open Pluggable Specification): A slot-in mini PC that instantly turns your smart board into a full-fledged Windows computer.
- Digital Whiteboard: Built-in software that replaces your traditional blackboard, offering infinite canvas space, diverse pen tools, and smart shapes.
- Internet Connectivity: Wi-Fi and LAN support for seamless web browsing, cloud storage access, and wireless casting.
What You Need Before Using a Smart Board
Before you begin your first digital board tutorial, ensure you have the following essentials ready to guarantee a smooth experience:
- Power Connection: A stable power outlet (preferably with a surge protector).
- Internet/WiFi: High-speed internet is essential for downloading apps, browsing, and wireless casting.
- Touch Pen (Stylus): Most smart boards come with dual-tip magnetic styluses for writing.
- HDMI & USB Cables: HDMI handles the video and audio, while the USB (Type A to Type B) cable enables the touch functionality when connecting a laptop.
- Type-C Cable: The modern standard for single-cable display, touch, and power transfer.
- Laptop/Desktop: For running heavy proprietary software or presenting locally stored files.
- OPS PC (Optional but recommended): The slot-in Windows module to run full desktop applications directly on the board.
- Audio/Video Peripherals: Built-in speakers, a webcam, and a microphone (essential if you are setting up a smart board for online teaching).
How to Set Up a Smart Board (Step by Step)
Are you standing in front of your brand-new IFP wondering what to do next? Here is a simple, step-by-step smart board setup guide:
- Step 1: Power ON: Plug in the main power cable, turn on the master switch (usually located at the bottom or back), and press the power button on the front bezel.
- Step 2: Connect WiFi: Navigate to the Android settings menu, select Network/Wi-Fi, and connect to your institution's internet.
- Step 3: Login: Log into your Google account (or the specific brand’s cloud account) to access Google Drive, the App Store, and cloud storage.
- Step 4: Update Software: Check for OTA (Over-The-Air) firmware updates in the settings.
- Running the latest software ensures maximum security and access to new smart board features.
- Step 5: Adjust Brightness: Swipe up or down from the bottom of the screen (or use the floating toolbar) to adjust screen brightness to suit your classroom lighting.
- Step 6: Calibrate Touch (If required): Modern IFPs rarely need calibration, but if the touch seems slightly off, locate the "Touch Calibration" tool in settings and tap the crosshairs on the screen.
- Step 7: Open Whiteboard: Tap the "Whiteboard" icon on the home screen, grab your stylus, and start writing!
How to Connect Laptop to Smart Board
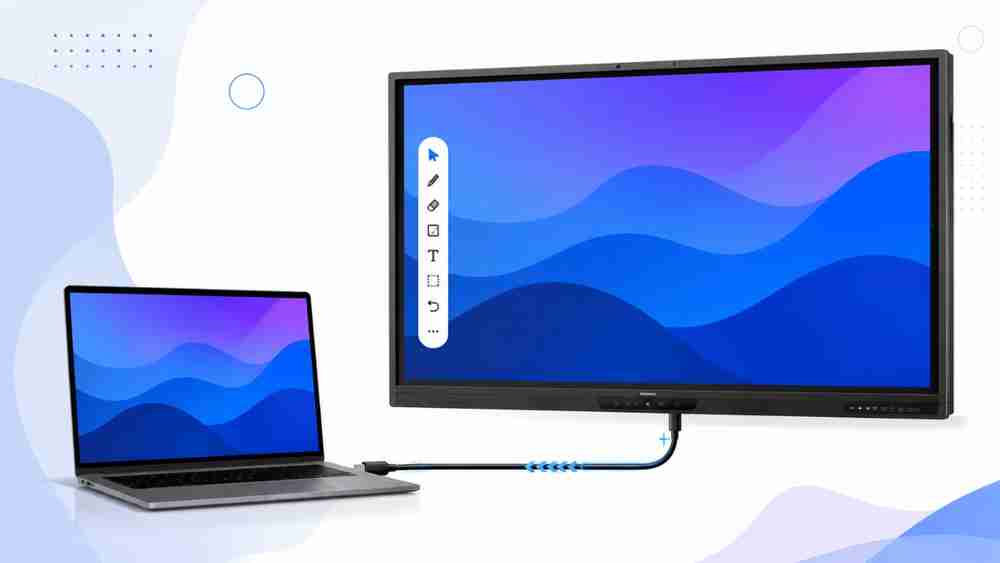
Knowing how to connect a laptop to a smart board is crucial for teachers who already have their lesson plans, PowerPoint presentations, and specific software saved on their personal computers.
Wired Connections
- HDMI + USB Touch: The most common method. Plug the HDMI cable into both devices to mirror your screen. Then, plug the USB Touch cable (square end into the board, flat end into your laptop). This allows you to control your laptop by touching the smart board.
- Type-C: If your laptop supports DisplayPort over USB-C, a single Type-C cable will transmit 4K video, audio, touch control, and even charge your laptop simultaneously!
Wireless Screen Sharing
- Wireless Casting Apps: Brands like Maxhub, Newline, and BenQ have proprietary casting apps (e.g., Bytello Share, ScreenShare Pro). Install the app on your laptop or phone, enter the 6-digit code shown on the smart board, and cast instantly.
- Miracast & Chromecast: Built-in protocols allow you to cast directly from a Windows PC (Windows Key + K) or Android phone without installing third-party apps.
- AirPlay: Teachers using MacBooks, iPads, or iPhones can seamlessly mirror their screens using Apple AirPlay.
- QR Casting: Open a document on the board, generate a QR code, and let students scan it to view or save the lesson on their personal devices.
How to Use Whiteboard Mode
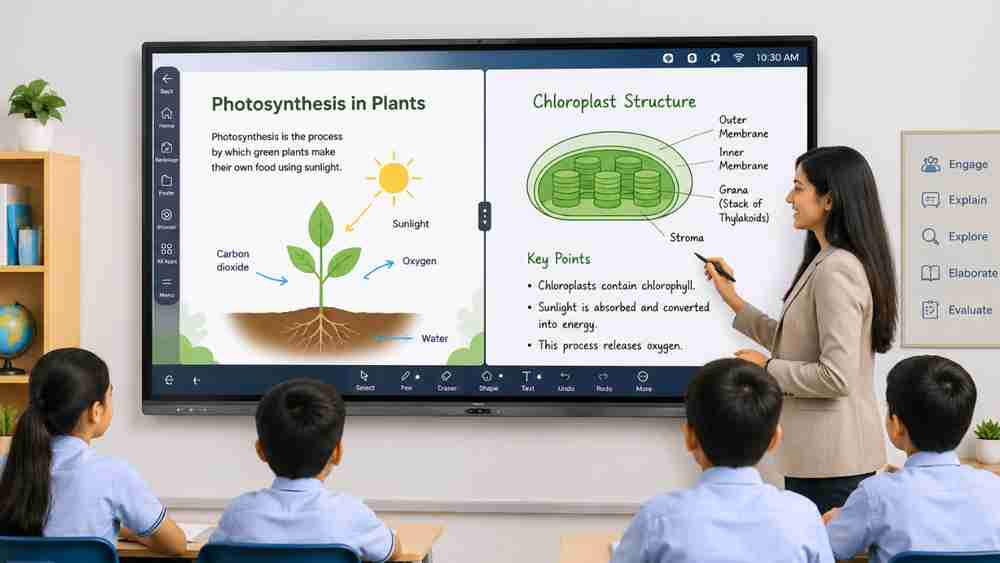
The digital whiteboard is where the magic happens. Mastering the smart board writing tools will elevate your teaching from standard to extraordinary.
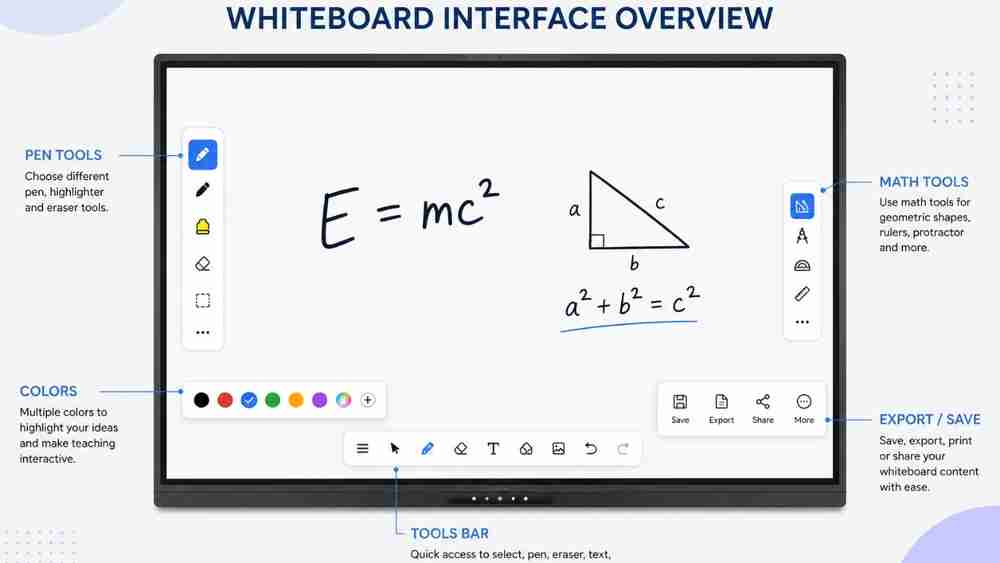
- Writing & Drawing: Use the stylus or your finger to write smoothly with zero latency.
- Changing Pen & Multiple Colors: Tap the pen icon to change thickness or color. Most boards support dual-pen recognition (e.g., the thin tip writes in black, the thick tip writes in red).
- Shapes: Instantly draw perfect 2D and 3D shapes (circles, cubes, cylinders) using the shape tool.
- Erase: Use the palm of your hand as a natural eraser—no need to select an eraser tool!
- Undo/Redo: Made a mistake? Just hit the undo arrow.
- Laser Pointer: Highlight specific areas of your presentation without drawing permanent lines.
- Math & Geometry Tools: Access built-in digital rulers, protractors, compasses, and graph backgrounds to teach geometry flawlessly.
- Handwriting Recognition: Turn on "Smart Pen" mode to convert your messy handwriting into neat, typed text or turn a rough circle into a perfect geometric shape.
- Save Notes & Export PDF: Never lose a lesson again. Save your whiteboard pages and instantly export them as a PDF.
- Screenshot: Capture any part of the screen, annotate over it, and drag it into your whiteboard canvas.
How to Use Smart Board During Teaching
A smart board is highly versatile. Here is how you can use a digital board in the classroom for daily activities:
- Morning Attendance: Display a visual attendance chart where students come up and tap their names.
- PPT, PDF, Word, Excel: Open standard Microsoft Office or Adobe files directly from a USB drive or cloud storage and annotate right on top of them.
- Videos & YouTube: Play educational 4K YouTube videos. Pause the video, grab a pen, and draw on the screen to highlight key concepts.
- Google Ecosystem: Log into Google Drive or Google Classroom to pull up assignments, rubrics, and collaborative docs in real-time.
- Maps & Browser: Open Google Maps to take your students on a virtual geography tour, zooming in with pinch-to-zoom multi-touch.
- Animations & Online Quizzes: Run interactive HTML5 animations for physics or host live quizzes.
- Drawing Diagrams & Science Experiments: Use split-screen mode to show a science video on one side while drawing the chemical diagram on the whiteboard on the other.
- Language & Math Teaching: Utilize the four-line ruling background for language writing practice, or the grid background for plotting math graphs.
Smart Board Features Explained
To get the most out of your investment, it helps to understand the diverse smart board features:
- 4K Display: Ultra-high-definition resolution ensures text is crisp and images are crystal clear, even from the back of the classroom.
- Multi Touch: Up to 20-40 simultaneous touch points, allowing multiple students to collaborate at the board.
- Palm Rejection: Rest your hand on the screen while writing naturally without triggering unwanted marks.
- Android & Windows OPS: Dual OS capability. Switch between Android (for quick whiteboard tasks) and Windows (for heavy software) with one tap.
- Built-in Whiteboard & Cloud Storage: Save directly to Google Drive or OneDrive.
- QR Sharing: Share the day’s notes with students instantly via a scannable QR code.
- Split Screen: Run two applications side-by-side (e.g., a browser and the whiteboard).
- Floating Toolbar: Access back buttons, home screen, annotation tools, and screen recording from anywhere on the screen.
- Screen Recording: Record your entire lesson—including your voice and on-screen annotations—to share with absent students.
- Annotation: Freeze any screen (even a playing video or a website) and write over it.
- Wireless Casting, Bluetooth, WiFi, NFC, USB-C: Ultimate connectivity options.
- AI Camera & Voice Assistant: High-end models feature auto-framing cameras for hybrid learning and voice controls.
- File Manager & App Store: Organize your PDFs and download educational apps natively.
Best Apps to Use on Smart Board
Enhance your lessons by downloading these must-have smart board apps:
- Whiteboard: The native digital canvas app (e.g., Note, EZWrite, Whiteboard).
- Google Classroom, Drive & Meet: Essential for assignment management and cloud access.
- Zoom & Microsoft Teams: Perfect for using your smart board for online teaching and hybrid classrooms.
- Canva: Open your visually stunning Canva presentations and interact with them on a massive screen.
- PowerPoint: The gold standard for slide-based lessons.
- YouTube: Endless access to educational videos and documentaries.
- Google Earth: Ideal for geography and history.
- GeoGebra: A powerful dynamic mathematics app for all levels of education.
- Kahoot & Quizizz: Gamify your classroom with interactive quizzes where students use their phones to answer questions shown on the board.
Tips to Make Teaching Interactive
Just having a screen isn't enough; pedagogical adaptation is required. Use these smart board teaching tips to transform your classroom:
- Student Participation: Have students come to the board to solve math problems simultaneously using split-screen whiteboard mode.
- Digital Quiz & Live Polls: Use voting software to instantly check student comprehension.
- Group Discussion & Mind Maps: Create collaborative mind maps to brainstorm essay topics or science projects.
- Drag & Drop Activities: Build templates where younger students drag words to match pictures.
- Drawing Practice & Gamification: Turn learning into a game using interactive apps, keeping student engagement at an all-time high.
Common Problems and Solutions
Running into issues? Here is a quick smart board troubleshooting guide:
- Touch not working: Ensure the USB touch cable is securely connected to your laptop. If using the built-in OS, try a quick restart.
- Internet issue: Forget the Wi-Fi network and reconnect, or check if the date and time settings on the board are correct (this often blocks internet access).
- No display / No sound: Check HDMI inputs. For sound, ensure the smart board is selected as the output speaker in your laptop's sound settings.
- Stylus issue: Most styluses are passive (no batteries). If it isn't writing, clean the screen's infrared frame.
- Lagging: Clear the background apps using the floating toolbar's task manager to free up RAM.
- Wireless casting issue: Ensure both the smart board and the casting device (phone/laptop) are on the exact same Wi-Fi network.
- Software update / Calibration issue: Run OTA updates regularly. Recalibrate only if the touch accuracy is visibly displaced from the pen tip.
Smart Board Maintenance Tips
Protect your investment with these simple smart board maintenance tips:
- Cleaning: Use a soft microfiber cloth. Lightly dampen it with a 70% isopropyl alcohol solution or screen cleaner. Never spray liquid directly onto the screen or the infrared frame edges.
- Software Updates & Backup: Regularly back up your saved lessons to a USB drive or cloud and keep the firmware updated.
- Storage & Screen Care: Don't leave the board on 24/7. Use sleep mode to preserve the backlight life.
- Ventilation: Ensure there is enough space behind the wall mount or mobile stand for heat dissipation.
- Accessories & Security: Keep styluses in their magnetic holders. Set a lock-screen password to prevent unauthorized student use between classes.
Why Schools Choose Edumark Technologies
Setting up a digital classroom requires more than just buying a screen off the internet; it requires a trusted technology partner. This is why educational institutions across the country choose Edumark Technologies.
We offer a complete range of smart classroom solutions, including:
- Interactive Flat Panels & Smart Boards
- Digital Podiums & Document Cameras
- OPS PCs & Video Conference Solutions
Unlike companies that sell only one brand, Edumark Technologies provides multiple leading Smart Board brands. This unique, brand-neutral approach helps schools, coaching institutes, and corporate offices choose the absolute right solution based on their specific budget, classroom size, software requirements, and teaching needs.
Furthermore, Edumark Technologies guarantees peace of mind by providing professional Installation, comprehensive Teacher Training, solid Warranty Support, Annual Maintenance Contracts (AMC), and PAN India Delivery.
Which Smart Board is Best? (Buying Guide)
If you are still in the market, here is a quick smart board buying guide to help you evaluate which model is best:
- Budget: Determine your price range. Having multiple brand options (like Edumark offers) helps you find the sweet spot between price and features.
- Screen Size: 65-inch for small classes (up to 30 students), 75-inch for standard classrooms (up to 50 students), and 86-inch for large lecture halls.
- Android Version: Look for Android 11, 12, or 13 for longevity and app compatibility.
- RAM & Storage: A minimum of 4GB RAM and 32GB storage is recommended, though 8GB/128GB is the new standard for zero-lag performance.
- Touch Points: Ensure it has at least 20 to 40 points of multi-touch.
- Software & Warranty: Check if the whiteboard software requires subscription fees (most good ones are free for life) and insist on a minimum 3-year onsite warranty.
Frequently Asked Questions (FAQ)
How do I use a Smart Board?
Power it on, connect to Wi-Fi, and open the built-in whiteboard app to write using the stylus. Alternatively, connect your laptop via HDMI and USB to present and control your computer from the board.
Can I use a Smart Board without a computer?
Yes. Modern Interactive Flat Panels have a built-in Android OS, meaning they function like a giant tablet. You can write, browse the web, and play videos without an external PC.
Does Smart Board need internet?
No, you can use the whiteboard, HDMI inputs, and offline files without the internet. However, internet is required for downloading apps, cloud storage access, and wireless casting.
Can Smart Board play YouTube?
Yes, you can play YouTube videos directly through the smart board’s built-in web browser or via a dedicated Android YouTube app.
How do I write on Smart Board?
Simply open the whiteboard software and use the provided magnetic stylus or your finger to write, draw, and highlight text.
Can students write together?
Yes, most modern smart boards feature 20 to 40 multi-touch points, allowing several students to write, draw, and drag elements on the screen simultaneously.
Does it support Zoom?
Yes. You can run Zoom either through the built-in Android OS, or via a connected Windows laptop/OPS module for seamless online teaching.
Can I connect my phone?
Absolutely. You can wirelessly cast your Android or iOS smartphone screen to the smart board using Miracast, AirPlay, or brand-specific casting apps.
Which Smart Board is best?
The "best" board depends on your needs. A 75-inch panel with Android 11+, 8GB RAM, and zero-bonding touch technology is widely considered the standard for modern classrooms.
How much does a Smart Board cost?
Prices vary based on size, brand, and specifications, typically ranging from affordable options for small coaching centers to premium enterprise models. Contact Edumark Technologies for custom quotes.
How long does a Smart Board last?
High-quality interactive flat panels are rated for 50,000 to 100,000 hours of screen life, which equates to over 10-15 years of standard classroom usage.
Which size should I buy?
65" is great for huddle spaces/small classes, 75" is the standard for 40-50 students, and 86" is best for large college lecture halls.
Is training required?
While IFPs are intuitive and operate much like a smartphone, basic teacher training (provided by Edumark Technologies) is highly recommended to unlock advanced educational tools.
Can I save notes?
Yes. You can save whiteboard sessions directly to the internal memory, a USB drive, Google Drive, or export them instantly via QR code as a PDF.
Does it support Windows?
Yes. You can connect any Windows laptop via cable, or purchase an OPS (Open Pluggable Specification) mini-PC that slots directly into the board, giving you built-in Windows 10/11.
Conclusion
Transitioning to an interactive classroom doesn't have to be intimidating. By understanding how to use a smart board—from setting up cables to mastering digital whiteboard tools and interactive apps—teachers can create a highly engaging, future-ready environment for their students. Remember, the hardware is only as good as the educator using it, which is why taking the time to explore all the smart board functions is a game-changer.
When investing in this technology, it is crucial to choose the right smart board rather than just opting for the cheapest one on the market.
Looking for the right Smart Board for your school, coaching institute, college, or office?
Edumark Technologies offers multiple leading interactive flat panel brands, expert consultation, professional installation, comprehensive teacher training, and reliable after-sales support to help you build a future-ready digital classroom. Contact Edumark Technologies today to book a demo and transform your teaching experience!